
Los subdominios ayudan a organizar las diferentes secciones de un sitio web, manteniendo a la vez URLs simples y fáciles de leer. Por ejemplo, su tienda en línea podría estar en shop.domain.tld. Además, el subdominio en sí mismo también puede funcionar como un sitio web completamente independiente. Si desea crear un subdominio en un plan de alojamiento Agency, simplemente siga los pasos a continuación.
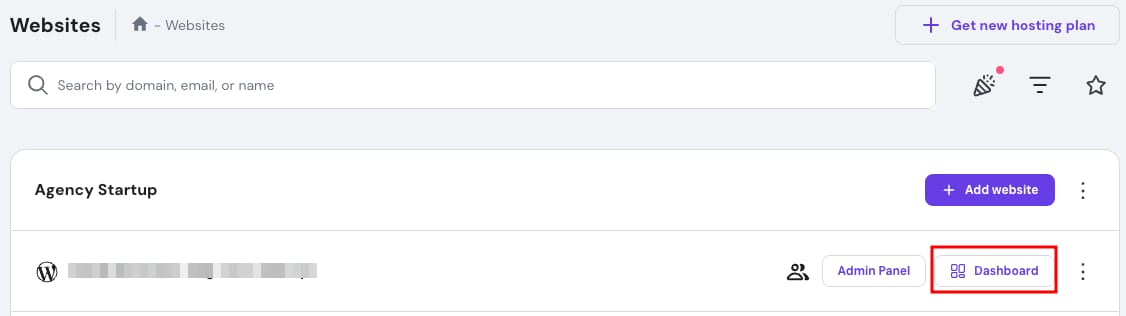
Paso 1 —— EnhPanel, vaya aWebsitesárea y haga clic junto al sitio web correspondiente enDashboard (Tablero):
Paso 2 —— Luego, en la barra lateral izquierda, busqueSubdomains (Subdominios)y haga clic:
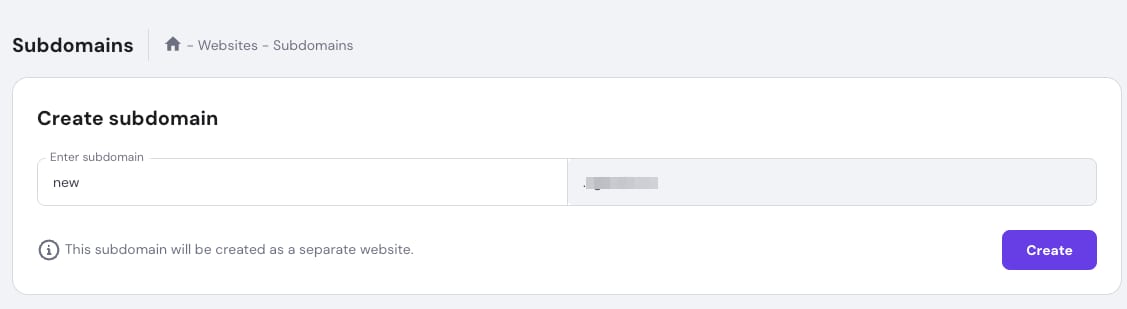
Paso 3 —— EnCreate subdomain (Crear subdominio), ingrese el nombre del nuevo subdominio y luego haga clic enCreate (Crear).
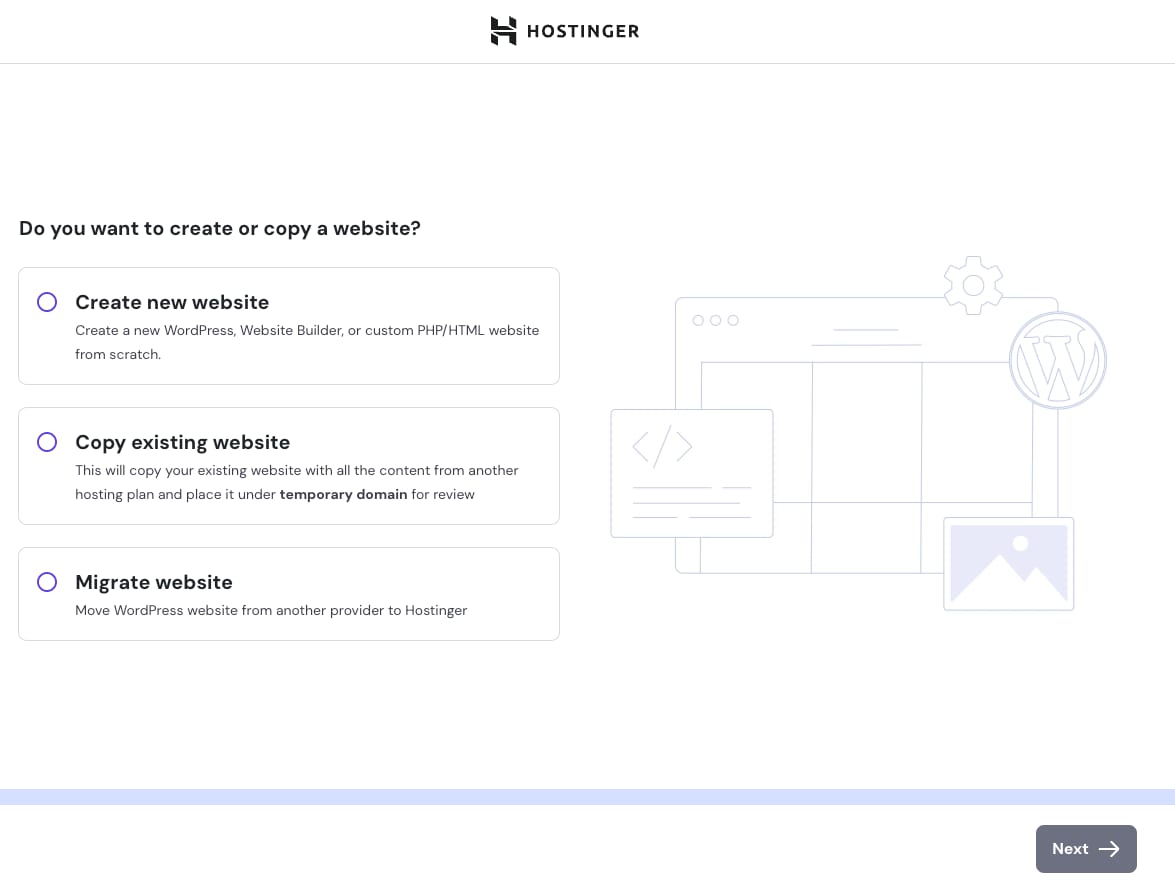
Paso 4 —— Luego, elija cómo desea construir el sitio web. Tenemos las siguientes opciones:
- Crear un sitio web nuevo
- Copiar sitio web existente
- Migrar sitio web
Paso 5 —— Según su elección, complete los pasos restantes siguiendo el proceso guiado.
Puede optar por crear subdominios para los dominios conectados a un plan de hosting Agency (sin necesidad de editar la zona DNS), comprar un dominio nuevo o conectar subdominios desde otros proveedores (lo que requerirá verificar la propiedad del dominio posteriormente).
Después de completar estos pasos, verá el panel del nuevo subdominio, donde podrá gestionar su configuración.
Fuente: documentación oficial de Hostinger